Skip to content
English
  • There are no suggestions because the search field is empty.

How to setup a Timesheet Authorisation process

Learn how to create a new Timesheet authorisation process within your Cezanne system.

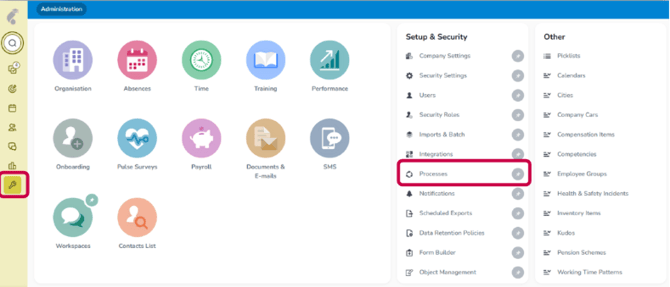
  1. Navigate to Administration then Processes 
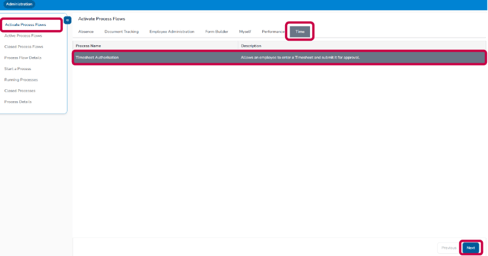
  2. Go to Activate Process Flow
  3. Go to Time and click on Timesheet Authorisation
  4. Click Next 
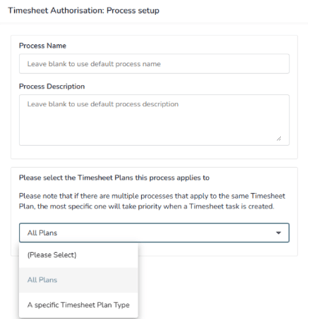
  5. Name your Timesheet and choose the correct Timesheet format 
  6. Set the number of stages for the process 
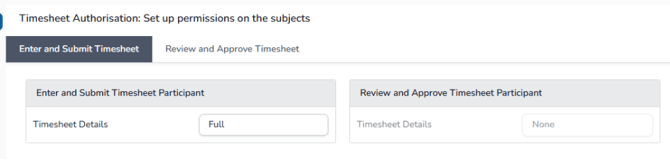
  7. Alter the permissions 

💡Tip

Use a clear, memorable Process Name and, if helpful, use the Process Description to explain the process.

You can apply the process to all Timesheet plans or a specific Timesheet Plan Type. Even if you create separate processes for individual plans, we recommend creating one for all plans to ensure future Timesheet plans are covered. 

Understanding Stage options

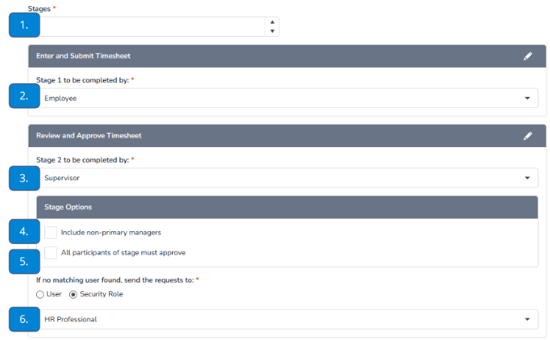
1. Number of Stages

Enter the number of stages needed for the relevant process flow. Each stage after the first can have a different approver.

For example, a simple Timesheet approval process could have two stages:

  • Stage 1: The employee completes and submits their Timesheet.
  • Stage 2: The Line Manager approves or sends the Timesheet back.
2. Enter and Submit Timesheet Section

The Enter and Submit stage is always the user who starts the process.

Important note: We recommend setting Stage 1 to Employee, unless there is a specific reason to use another security role.

3. Process Nominated User

The security type selected here determines who receives the process as a task in their task tray.

For example, if Stage 2 is for Timesheet approval, you could select the Line Manager as the nominated user.

4. Include non-Primary Managers

Use this option if an employee has more than one deployment.

By default, Timesheet requests are only sent to the employee's primary deployment manager.

5. All Participants of Stage must approve

This option is rarely used for Timesheet processes. If enabled, all participants in the stage must approve the request before it can move to the next stage.

Helpful tip: Never use this option for an HR Professional task, as Cezanne's support user is also set up in the system as an HR Professional. This could result in a member of the support team needing to approve every process.

6. No Matching User Requests

This option ensures that requests are not lost if the user required for a stage does not exist in the system.

Helpful tip: We recommend sending these requests to the HR team if no matching user is found.