Webhooks in Cezanne allow you to integrate key information with other platforms in real time. When an event happens in Cezanne (e.g. a change to an Address record), a webhook will automatically notify the connected platform (sometimes known as an endpoint). Events include adding new records, editing records, and deleting records. These events are split into categories based on the record type and are known as triggers in the system.
To use webhooks, you must set up a webhook for each platform or endpoint and activate it by enabling specific triggers which will set the webhook off.
This article explains how to set up and activate webhooks in the following sections:
1. Add a new Webhook
Navigate to: Administration >> Setup & Security >> Integrations >> Webhooks.
- Click Add New at the bottom of the screen:
-
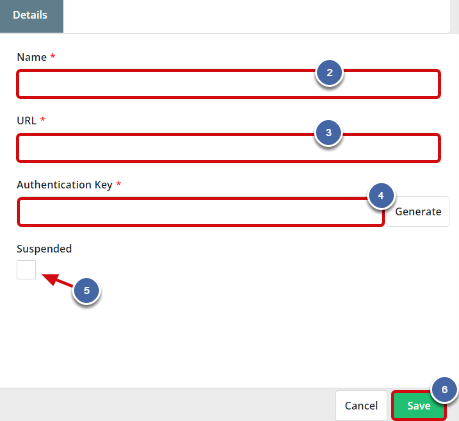
- You may want to specify what the webhook is being used for e.g. the name of the platform your webhook will be sent to.
2. Enter your webhook's endpoint URL (must be an HTTPS link).
3. Enter an Authentication Key, or generate a random one using the Generate button.
-
- This will be used as a verification for the app receiving the data.
-
- You can also suspend it at any point after setting it up using this checkbox.
- Once it has been suspended, use the same checkbox to enable it again.
2. Configure a Webhook's Triggers
After your Webhook Details have been set up and saved as above, the Triggers tab will appear:
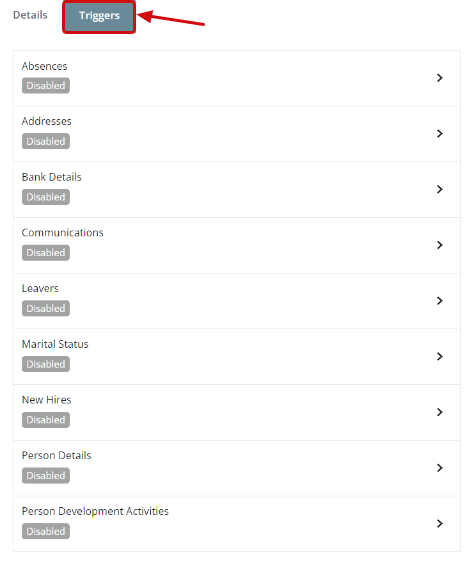
Triggers define which actions or events will set off your webhook. There are 9 types of trigger, each of which corresponds to a record within Cezanne. If a trigger is enabled, the webhook will be initiated when its corresponding record has been inserted, updated or deleted in the system.
For example: if the 'Addresses' trigger is enabled and an Address record is updated, the data for the change will be automatically sent to your endpoint through your webhook.
Enabling triggers
To enable Addresses, Bank Details, Communications, Marital Status, Person Details and Person Development Activities triggers:
- Click on a trigger to open the slide over (e.g. Addresses).
- Tick the Enable checkbox.
- Click Save and Close.
Absences trigger configuration
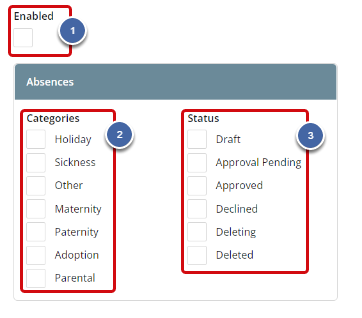
When enabling the Absences trigger, more configuration options are given to narrow down which types of absences can trigger the webhook and when.
To enable the Absences trigger you must:
- Tick the Enabled checkbox.
- Tick at least one Category.
- Tick at least one Status.
- Click Save and Close.
For example, if you want to enable triggers for Approved Holiday and Sickness Absences, you would check the Enabled, Holiday, Sickness and Approved boxes:
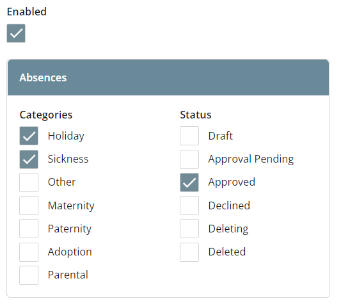
This configuration would mean any time a Holiday or Sickness request was Approved or an Approved Holiday or Sickness record was edited, the webhook would be automatically triggered.
Leavers / New Hires trigger configurations
When enabling the Leavers and New Hires triggers, a further configuration option is available for when the webhook should be triggered.
To enable a Leavers or New Hires trigger you must:
- Tick the Enabled checkbox.
- Select either Trigger Real-time or Trigger Overnight.*
- Click Save and Close.
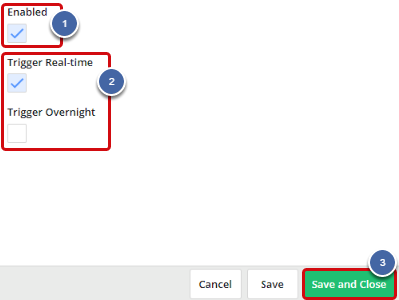
*Selecting 'Trigger Real-time' means the trigger will be sent automatically as soon as a Leaver or New Hire record has been added, changed or deleted. Selecting 'Trigger Overnight' means all triggers for Leavers and New Hires that happen in a day will be sent that night.