Skip to content
English
  • There are no suggestions because the search field is empty.

How to create a Clock In/Out Timesheet Plan

Learn how to create a Clock In/Out Timesheet Plan and the recommended settings to use.

📝 Note

This guide only covers the steps for creating a Clock In/Out Timesheet plan. To learn more about what a Clock In/Out Timesheet does and how it looks, have a look at the Time module Overview article.

Steps to follow:

  1. Navigate to Administration then select Time
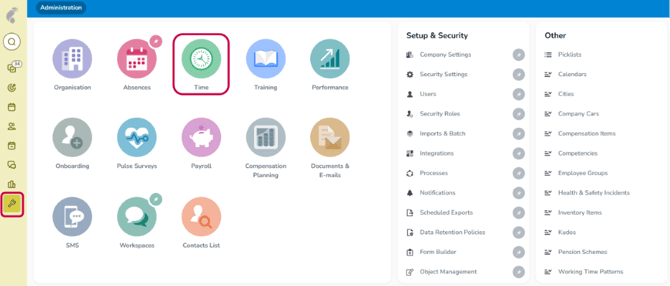
  2. Click on Timesheet Plan Types 
  3. Select Add New to create a new Timesheet type
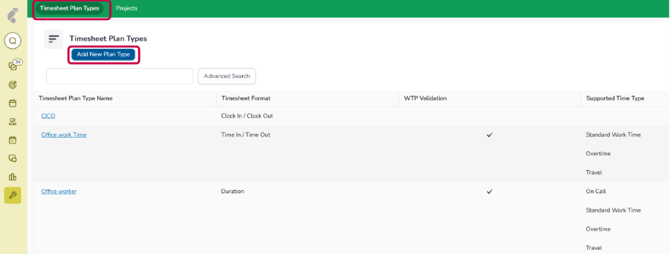
  4. Name this timesheet something distinct that is easy to remember
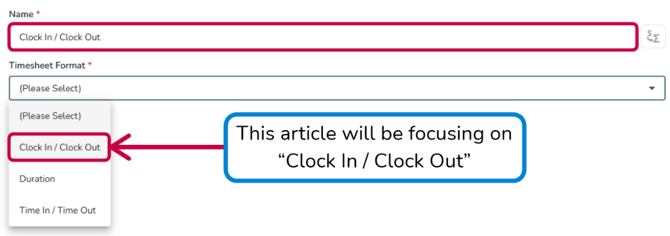
  5. Choose the correct Timesheet format  
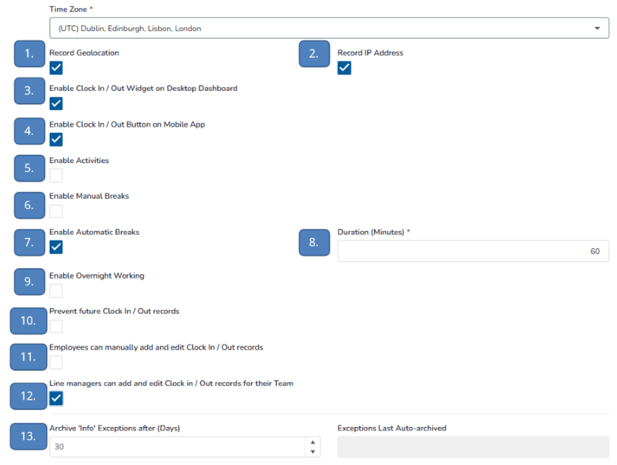
  6. Enable all relevant options for the Timesheet
Your Timesheet can now be assigned to employees on your system! This can be done in one of two ways: (LINKS)

Timesheet tick box options

1. Record Geolocation

When ticked, the geolocation of the employee's device used to clock in/out is recorded.

Note: Regardless of this setting, if location services are turned off on the employee's device, the geolocation cannot be tracked.

2. Record IP Address

When ticked, the IP address of the employee's device used to clock in/out is recorded.

Important note: If ticked, this will prevent entering time on a day even if an absence is only half a day.

3. Enable Clock In/Clock Out on Desktop

When ticked, employees can clock in/out using a button on their Desktop Bar.

4. Enable Clock In/Clock Out on Mobile

When ticked, employees can clock in/out using a button in the Cezanne Mobile App.

5. Enable Activities

If ticked, employees can clock in and assign their clocked-in time to a specific activity.

6. Enable Manual Breaks

If ticked, employees can clock their own breaks.

This cannot be ticked if Enable Automatic Breaks is ticked.

7. Enable Automatic Breaks

If ticked, you can enter how long a break employees on this plan should take. This break is automatically deducted from the employee's clocked-in hours at the end of their working day.

This cannot be ticked if Enable Manual Breaks is ticked.

8. Duration (Automatic Breaks)

If Automatic Breaks are enabled, this field appears and allows you to choose how much time is deducted from the employee's total at the end of a shift.

9. Enable Overnight Working

Only tick this if employees on this plan work overnight. We recommend only assigning this plan to employees who work overnight.

10. Prevent Future Clock In/Out Records

Tick this option if you do not want employees to enter future clock in/out records.

Any future records created by employees are sent to their Line Manager as an exception for approval.

11. Employees can manually add and edit Clock In/Out records

This grants employees editing capabilities on their Clock In/Out timesheets. Any changes made are raised as an exception to their Line Manager for approval.

12. Line Managers can manually add and edit Clock In/Out records

This grants Line Managers the ability to manually add and edit Clock In/Out records for employees.

13. Archive exception records

Any exceptions raised or declined for this Clock In/Out plan are archived after 30 days by default.