In Cezanne, employees can submit overtime requests which, depending on your company policy, can result in them being able to build up Time Off In Lieu (TOIL) to use in addition to their standard absence entitlement.
This article explains how to use the TOIL functionality in Cezanne and contains the following sections:
1. How TOIL works in Cezanne
When an employee works overtime eligible for Time Off In Lieu, they enter that time as a request which can be approved or declined by a manager or an HR Professional.
Once the overtime record is approved, the TOIL earned will be added to their TOIL balance and will be automatically allocated when booking absences using the normal Absence Request process.
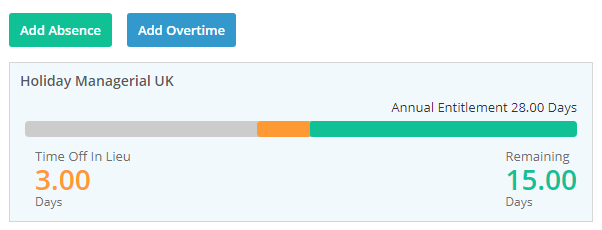
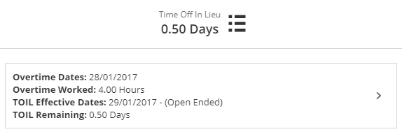
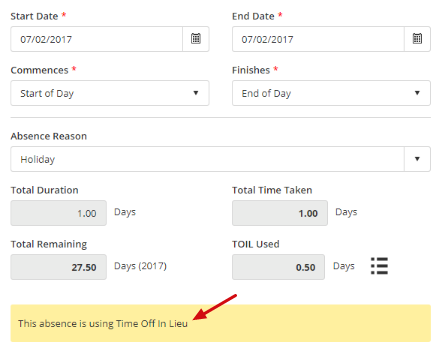
Example

2. Setting up TOIL in Cezanne
To set up and use TOIL in Cezanne, you should review the following four sections:
Absence Plan Type Details
Navigate to: Absences >> Absence Plan Types >> Absence Plan Type Details
1. Switch TOIL ON.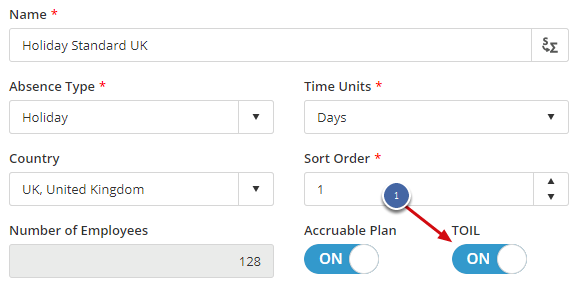
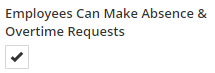
In order for employees to make overtime requests, the Employees Can Make Absence & Overtime Requests option needs to be ticked in the Administrative Settings section.
Absence Plan
Navigate to: People >> Holiday & Absences >> Absence Plans >> TOIL tab
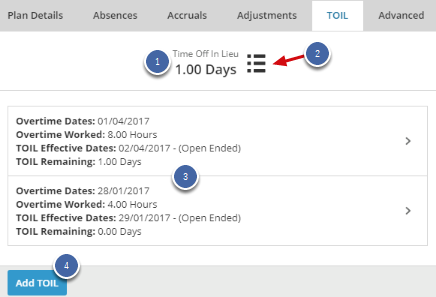
The following sections are available:
- TOIL Remaining Balance - Includes all TOIL records with an Expiry Date in the future.
- TOIL Details Menu - Select to see an overview of the TOIL balance (see below).
- Overtime Records - Displays all Overtime Records.
- Add TOIL - Select to add a new overtime record.
TOIL Details Menu
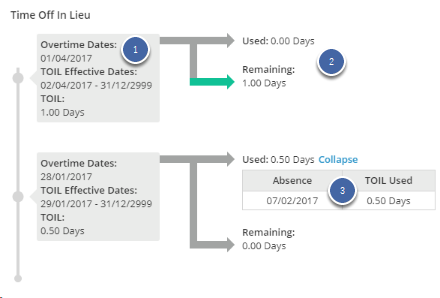
This menu contains a breakdown of all TOIL records.
It displays:
- The Details of the Overtime and TOIL record.
- TOIL Used and Remaining from that record.
- The Absence(s) which the TOIL record was used on.
Overtime Request Process
In order to enable employees to send overtime requests for approval and build up TOIL, you must first activate a process flow. The Overtime Request Process Flow can be set up to include up to 4 configurable approval stages.
If you want employees to be able to request the deletion of overtime records, you must activate the Overtime Deletion Request Process Flow.
For more information about setting these up, see: Overtime Request Process Flow.
Employee Request
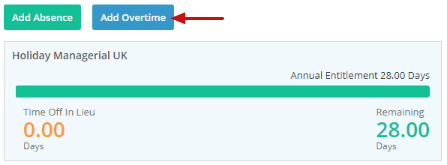
To make a request, an employee can click Add Overtime from either the My Absences Summary Widget or the Absences Screen.
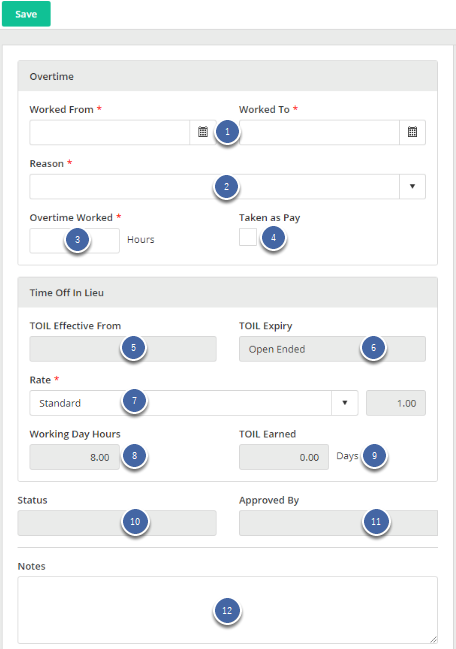
The following fields are available on the request screen:
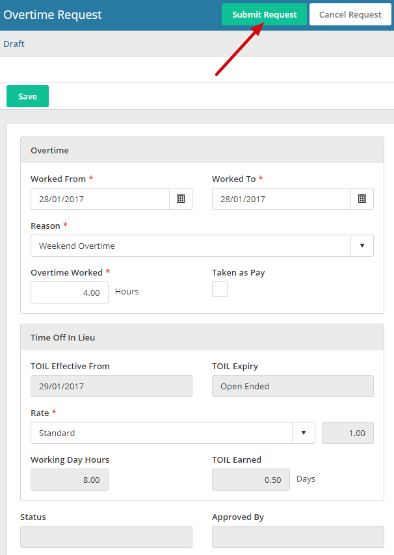
- Worked From and Worked To - The dates of the overtime.
- Reason - The reason for the overtime.
- Overtime Worked - The amount of overtime worked in the Overtime Time Units.
- Taken as Pay - Indicates whether this is paid overtime.
- TOIL Effective From - Is filled in automatically as one day after the Worked To date.
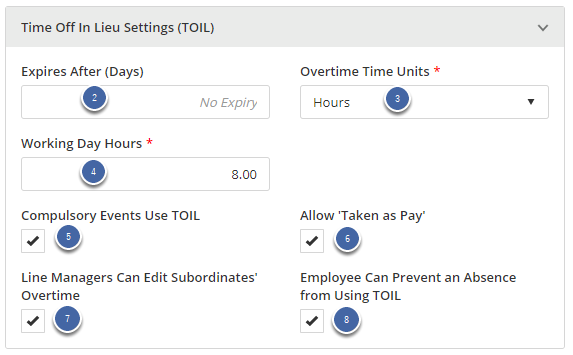
- TOIL Expiry - Is filled in automatically as the Expires After (Days) field (entered on the Absence Plan Type Details screen) specifies how long after the TOIL Effective From date the record expires.
- Rate - The rate for the overtime.
- (Read-only) Working Day Hours - The value specified on the Absence Plan Type.
- (Read-only) TOIL Earned - (Total Overtime Worked / No. of Hours in a Day) x Rate.
- (Read-only) Status - The status of the request (e.g. Draft, Approval Pending, Approved, etc).
- (Read-only) Approved By - The name of the approver.
- Notes - Relevant notes to accompany the request.